
We are reader supported. When you purchase through links on our site, we may earn an affiliate commission. Also, as an Amazon affiliate, we earn from qualifying purchases.
Breaking in a first baseman’s mitt is different from breaking in any other glove. The mitt is bigger, stiffer, and built to scoop, pick, and stretch. If you’re new to first base or you just bought a fresh mitt, this guide will show you clear, safe, and beginner-friendly methods to get your leather game-ready without ruining it. The steps below are built around simple tools, light conditioning, and repeatable routines. You will learn how to set your preferred closure (standard or two-in-the-pinky), shape a deep pocket, protect the leather, and avoid the most common mistakes that shorten glove life. By the end, you’ll have a soft, strong mitt that closes smoothly on short hops and lasers—and holds that shape all season.
Why a First Baseman’s Mitt Breaks In Differently
A first baseman’s mitt is more like a catcher’s mitt than a fielder’s glove. It has a longer length, a curved “shovel” profile for scoops, a deeper and wider pocket, and stronger heel padding. Many have single- or dual-post webs and a stiffer heel to keep the mouth of the mitt open for picks. Because of that extra stiffness, the mitt takes more deliberate work to open and close smoothly.
Another key difference is the closure angle. Infield gloves often close thumb to middle finger. A first base mitt can close more thumb-to-ring or thumb-to-pinky, depending on your preference. If you set the wrong closure early, you’ll fight the shape later. So step one is deciding how you want it to close before you start bending anything.
Choose Your Target Shape First
Before you condition or pound the pocket, decide how you want to hold and close the mitt. This choice guides every bend and wrap you do.
Standard Grip (Index finger in index stall)
This is the default fit most players start with. It keeps your hand centered and gives a balanced pocket. It is good for players with smaller hands or anyone who likes a traditional feel. Closure is usually thumb to middle or ring finger, giving good control for quick tags and double plays.
Two-In-The-Pinky (TIP) Grip
In TIP, you place your ring and pinky fingers together in the pinky stall, shifting the index and middle fingers one stall over. This opens the hand, deepens the pocket, and moves the closure more toward thumb-to-pinky. Many first basemen prefer TIP because it makes picks easier and holds hard throws more securely. If you choose TIP, start your break-in with that grip from day one, because the mitt will “learn” that shape quickly.
Tools and Supplies You’ll Need
You do not need anything fancy. Use light amounts and be patient. These items are common and available on Amazon:
Conditioners and Oils (use sparingly)
Look for glove-specific products, not household oils. Examples include Rawlings Glovolium, Wilson Pro Stock Glove Conditioner, Nokona NLT Classic, Sarna Baseball Glove Conditioner, and Hot Glove Cream Conditioner. These are designed to soften and protect glove leather without over-saturating it.
Mallet and Ball
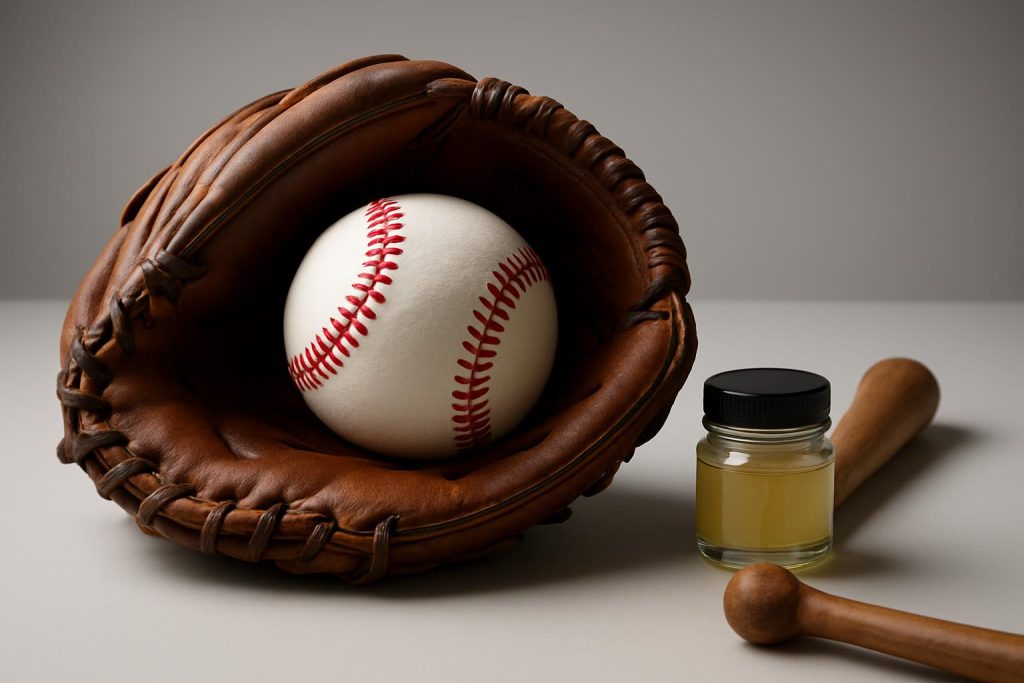
A glove mallet helps form a clean pocket. Examples include the Rawlings Glove Mallet and the Franklin Sports Baseball Glove Mallet. Pair with a regulation baseball like Rawlings Official League baseballs. If you play softball first base, use a 12-inch softball for pocket forming.
Glove Wrap or Band
A wrap holds your shape overnight. Examples include the Rawlings Glove Wrap, Markwort Glove Wrap, and Hot Glove Wrap. A wide elastic band or soft athletic wrap can also work if you do not have a glove-specific wrap.
Lacing Kit (optional)
Not required for initial break-in, but useful if you need to tighten or replace a stretched lace after a few weeks. Look for the Rawlings Glove Lacing Kit or Markwort Glove Lacing Kit.
The 2026 Step-by-Step Break-In Plan
This plan uses light conditioning, smart flexing, and short daily sessions of catch. It keeps the leather healthy and sets a long-lasting shape. Expect about 10–21 days for a first baseman’s mitt to feel game-ready, depending on leather type and how often you work it.
Day 0: Inspect and Dry Fit
Put on the mitt dry. Decide your grip (Standard or TIP). Close the mitt gently and note where it naturally wants to bend. Do not force hard bends yet. Check the laces for any loose knots. If the factory laces are unusually loose, snug them gently at the web and heel. You want the glove stiff but not locked shut.
Place a ball in the pocket and try a few slow closes. Visualize where you want the deepest part of the pocket to be. For most first basemen, that spot is slightly below the web, centered to the ring/pinky side, so scoops sit deep and secure.
Day 1 (Morning): Light Conditioning
Apply a pea-sized amount of glove conditioner to a clean cloth. Rub it into the hinge areas (thumb base and pinky base), the heel, and lightly across the pocket and web laces. Avoid soaking the palm and avoid overloading the binding or stitching. A little goes a long way.
Let it sit for 20–30 minutes to absorb. Wipe off any extra with a dry cloth. The leather should look slightly richer, not wet or greasy.
Day 1 (Evening): Heel and Hinge Flex
With your chosen grip, open and close the mitt 50–75 times in a smooth, slow motion. Focus on the heel flex first—this is the thickest, toughest part. Place your off-hand palm on the heel and gently press while closing, so the break starts at the heel and moves upward into the pocket.
Next, work the thumb hinge (where the thumb meets the palm). Support the thumb from the back and gently flex it inward. Then flex the pinky side inward. Keep it gentle. You are teaching the leather a path, not crushing it.
Day 2–3: Pocket Forming With Ball and Mallet
Place a baseball in the spot you want to become the deepest part of the pocket. Close the mitt firmly around it with your chosen grip. Use a wrap to hold it closed for 10–15 minutes. Remove the wrap and pound the pocket lightly with a mallet for 5–10 minutes, striking around the ball outline, the web base, and the center pocket. Re-seat the ball and wrap again for another 10–15 minutes.
Repeat this cycle once or twice. The key is rhythm—close, pound, shape, rest. If you do not have a mallet, you can repeatedly pop a ball into the pocket by hand, but the mallet speeds the process and keeps the shape consistent.
Day 3–7: Daily Catch Routine
Start playing catch for 10–20 minutes a day. Begin with easy throws at mid-chest so you can focus on clean catches and smooth closes. Every 10 throws, squeeze and hold the ball in the pocket for a couple of seconds to reinforce the shape.
Mix in grounders and short hops off a rebounder or soft wall. Work glove-side picks gently at first. Think “soft hands.” Keep the ball centered in the pocket you formed. After catching, put a ball in that pocket spot and wrap the glove for at least 30 minutes. If you can, leave it wrapped overnight.
Optional Assist: Low, Dry Heat and Massage
If the leather still feels stubborn in the heel after a few days, you can use a short burst of low, dry heat to help the conditioner absorb. Use a hair dryer on low setting for 20–30 seconds at a time, a foot away from the glove, moving constantly. Then massage a tiny bit of conditioner into the heel and hinge while the leather is slightly warm. Do not overheat, do not use an oven, and do not use a space heater. Overheating can ruin the leather and padding.
Nightly Wrap Technique
Every night during the first week, place a ball in the pocket, close the mitt using your chosen grip, and wrap it snugly—not so tight that you crease the leather, but tight enough that it holds the shape. Store the mitt in a cool, dry place away from heaters or direct sun.
End of Week 1: Checkpoints and Micro-Adjustments
By the end of the first week, the mitt should close more easily, and the pocket should be forming under the web. Test a few harder throws and a handful of picks. If the ball still pops out, your pocket may be too shallow or off-center. Re-mark the deepest spot by pressing a ball in, pound the outline lightly with the mallet, and wrap again overnight.
If the thumb feels stiff compared to the pinky, add a small amount of conditioner at the thumb hinge, flex gently, then catch a few balls aimed to the thumb side of the pocket. This encourages a balanced closure path.
Week 2: Game-Speed Reps
Increase catch sessions to 20–30 minutes. Add more game-like throws: across-the-diamond rockets, low darts, and in-between hops. After each session, pound a bit around the web base where most hard catches will hit. Always finish by wrapping with a ball in the pocket.
At this stage, lots of players switch to TIP if they started standard. If you are considering a switch, do it now rather than later. Once the mitt is fully broken in, changing grips can undo your pocket shape.
Week 3: Ready for Live Play
By week three, most quality leather will be game-ready. The mitt should open easily for scoops but still have enough backbone to hold its shape. The pocket should “receive” hard throws without the ball rattling. Keep your wrap habit going; it protects the shape when the glove is not on your hand.
Steam, Ovens, and Other Shortcuts: What Works in 2026?
Glove steaming is a fast way to soften leather, but it is easy to overdo. If you use steam, do it once, very lightly, and shape right away while the leather is warm. Many pro shops have controlled steamers and can help. Home attempts can lead to over-saturation, weak laces, and a mushy glove. Ovens, microwaves, and boiling water are never recommended. Those methods can damage padding, melt adhesives, and dry out leather to the point of cracking.
If you want a fast assist and you cannot get to a pro shop, a low-heat hair dryer for short bursts plus gentle conditioner and mallet work is the safer choice. Your mitt will last longer and keep its backbone.
Do’s and Don’ts for First Base Mitt Care
Do use glove-specific conditioners in tiny amounts. Do work the heel and hinges first, because that is where most mitts are stiff. Do pound and wrap with a ball in the pocket you actually want to use. Do play catch often—real ball impact shapes leather best. Do store in a cool, dry place and keep your wrap habit.
Don’t soak the glove in oil or water. Don’t leave it in a hot car, under a heater, or in direct sun. Don’t crush the mitt flat under weights. Don’t over-steam. Don’t bend the thumb/pinky backward at extreme angles—they can crack or crease.
Special Notes for Youth and Softball First Basemen
Youth first base mitts use softer leather and break in faster, sometimes within a week. Go even lighter on conditioner, and keep catch sessions short to avoid over-softening. When choosing youth size, pick a mitt that the player can fully close within a couple of weeks; if it is too big, they will push against bad angles and create awkward creases.
For softball, use a 12-inch ball for pocket forming and focus on creating a wider, slightly higher pocket under the web. A deeper pocket helps secure the bigger ball on short hops and hard throws.
In-Season Maintenance and Longevity
Once your mitt is broken in, maintain, don’t remake. After muddy or dusty games, wipe the leather with a slightly damp cloth and let it air-dry. Add a tiny bit of conditioner every few weeks or when the leather looks dry—more often in hot, dry climates and less in humid ones.
Check laces monthly, especially the web base and the hinge laces at the heel. If you see stretching or frayed areas, use a lacing kit to replace the lace before it snaps during a game. Keep wrapping with a ball in the pocket after practices and games to preserve the shape.
Troubleshooting Common Issues
The thumb side is stiff and won’t close smoothly
Warm the thumb hinge with a hair dryer on low for 20–30 seconds from a safe distance. Massage a tiny amount of conditioner into the hinge and the base of the thumb. Play catch with throws aimed to the thumb side to teach that path. Lightly pound the pocket on the thumb-side edge to encourage a true arc.
The pocket is too shallow and balls pop out
Seat a ball deeper under the web toward the ring/pinky side. Pound around the ball outline and the base of the web for a few minutes. Wrap the mitt around the ball and leave it overnight. Repeat for two or three nights. During catch, hold the ball squeezed in the pocket for a couple of seconds every few throws.
The mitt feels floppy after a few days of work
You probably used too much product or over-steamed. Let the mitt rest completely for a few days with no conditioner. Wrap it with a ball in the pocket to regain structure. If the web laces are loose, tighten or replace them. Limit conditioner to a tiny amount no more than once every few weeks.
The heel is rock hard and won’t bend
Focus on the heel only. Lightly warm with a hair dryer on low, then hand-flex in small sets of 10 closes, rest, and repeat. Pound the heel edge with a mallet to soften fibers, then resume closes. Do not use heavy oil on the heel—this can lead to long-term mushiness.
Stinging or palm pain on hard throws
Use a palm pad insert or a thin batting glove until the leather settles. Make sure your pocket is under the web so throws land in leather, not on palm padding. Pound and shape that exact spot so the ball “sits” rather than slaps.
Recommended Amazon Gear List (Examples)
These examples are commonly available on Amazon and work well for the methods above. Choose one from each category; you do not need everything.
Conditioners: Rawlings Glovolium; Wilson Pro Stock Glove Conditioner; Nokona NLT Classic; Sarna Baseball Glove Conditioner; Hot Glove Cream Conditioner.
Mallets and Pocket Tools: Rawlings Glove Mallet; Franklin Sports Baseball Glove Mallet. A standard baseball like Rawlings Official League works for shaping; use a 12-inch softball for softball mitts.
Wraps: Rawlings Glove Wrap; Markwort Glove Wrap; Hot Glove Wrap. A wide elastic band can substitute in a pinch.
Lacing Kits: Rawlings Glove Lacing Kit; Markwort Glove Lacing Kit. If you are not comfortable with relacing, consider a local shop, but having a kit is useful for quick fixes.
Practice Drills That Speed Up Break-In
Wall toss with focus: Stand 25–35 feet from a wall or rebounder. Aim for chest-high throws and catch in the same pocket spot every time. Do this for 5–10 minutes daily. Add in ground balls rolled by a partner for soft picks. This repetitive impact shapes the pocket faster than random catches.
Short-hop series: With a partner 30–45 feet away, have them bounce throws 5–10 feet in front of you. Work glove presentation low to high, catching softly in the pocket. Keep your wrist firm but your fingers relaxed. This builds the exact break you need for real picks.
Tag-and-transfer reps: Receive throws at various heights and practice fast tags. This teaches the mitt to close and open smoothly without twisting. It also helps you refine where you like the ball to sit on tag plays.
Advanced 2026 Technique: Targeted Hinge Setting
If you want a very specific closure path (for example, a deep thumb-to-pinky close for scoops), use targeted hinge setting. First, identify the primary hinge line from the base of the thumb across the heel to the base of the pinky. With the mitt slightly warm from a hair dryer on low, flex along that line only in small sets of 10–15 closes. Then play catch with throws aimed to the pinky-side pocket. Wrap the glove every night with a ball seated on the pinky side under the web. After a week, the mitt will prefer that path, resulting in a deep, stable scoop pocket.
Leather Types and How They Change the Timeline
Pro-grade steerhide and Japanese kip leathers are stiffer and take longer but hold shape longer. Expect 2–4 weeks. Mid-grade steerhide softens faster, often 1–2 weeks. Youth or game-ready leathers may be ready in days; use the lightest possible conditioning and more catch time. With all leather types, steady daily work beats heavy one-time treatments.
Common Myths to Avoid
Myth: More oil equals faster break-in. Reality: Excess oil weakens leather fibers and ruins padding. Use a tiny amount.
Myth: The oven or hot car trick is fine if you watch it. Reality: Heat damage is uneven and often permanent. Skip it.
Myth: You should sit on your glove or put it under a mattress. Reality: Crushing can create ugly creases that never leave.
Myth: Any leather product works. Reality: Shoe polishes, cooking oils, or petroleum jelly can stain, over-soften, or degrade the glove.
Sample Two-Week Schedule You Can Follow
Day 1: Light condition, heel and hinge flex, short mallet session, wrap overnight.
Day 2: Catch 10–15 minutes, pound pocket lightly, wrap overnight.
Day 3: Catch 15–20 minutes with short hops, wrap overnight.
Day 4: Light condition on hinges only if dry, catch 20 minutes, wrap.
Day 5: Mallet focus on web base and pocket, catch 10 minutes, wrap.
Day 6: Rest from product; play catch only, wrap overnight.
Day 7: Game-speed catch 20–30 minutes, wrap overnight.
Week 2: Repeat, but shift time toward more catch and less mallet. Re-condition once if the leather looks dry. By week’s end, it should be ready for live play.
FAQ: Quick Answers for First Basemen
How much conditioner should I use? A pea-sized amount per session is enough for the whole mitt. Spread thin. Wipe off excess.
Can I use water to soften the glove? No. Water swells fibers and can cause cracking when it dries. If the glove gets wet, air-dry it slowly and condition lightly after it is fully dry.
How do I keep the glove from getting too soft? Limit conditioner, avoid heavy steam, and keep wrapping with a ball when stored. Tighten or replace laces if they stretch.
Is TIP grip right for me? If you like a deeper, wider pocket for scoops and hard throws, TIP is great. If you prefer a more precise, balanced feel for tags and transfers, standard works well. Try both early in the break-in.
Can I break in a mitt just by playing catch? Yes. Catch is the best shaping tool. The extra steps here simply speed things up and guide the shape.
A Simple Care Kit You Can Build
Keep a small pouch in your bag with one conditioner, one mallet, a glove wrap, a microfiber cloth, and a spare lace from a lacing kit. With those, you can fix most shape or dryness issues on the spot and keep the glove feeling great all season.
Signs Your Mitt Is Perfectly Broken In
The glove opens easily when you set up for a pick and closes without a fight on the ball. The pocket “receives” rather than slaps. Hard throws stick, and the ball does not rattle. The web base and heel feel supportive, not floppy. When you place a ball in the pocket and close the mitt, it rests snugly in the same spot every time.
If You Inherit or Buy a Used First Base Mitt
Clean the leather with a damp cloth and let it dry. Add a tiny amount of conditioner at the hinges and heel. Check and replace any cracked or stretched laces at the web base first. Decide your grip and start the shaping steps from Day 1. Used gloves often need fewer mallet sessions but may need lace attention to regain structure.
Sustainability and Long-Term Leather Health
Breaking in slowly is not just about feel—it also lengthens the life of your mitt. Light, glove-specific products protect natural oils. Regular wraps protect the shaped pocket so you do not have to rework it constantly. Avoid harsh cleaners and heavy heat. In the long run, these small habits keep the leather strong for seasons, not months.
When to See a Pro Shop
If your mitt feels uneven after two weeks—like the thumb collapses but the pinky is rigid—or if the web laces are digging into the pocket, a pro shop can do a quick assessment. They might re-tie a couple of laces, add a simple relace at the web base, or do a controlled steam. Small, skilled fixes early prevent bigger problems later.
Conclusion
A great first baseman’s mitt does two things well: it opens fast for scoops and closes smoothly to secure the ball. You can build that feel with patient, simple work. Choose your grip, set your hinge and pocket with light conditioner and mallet sessions, play daily catch to “teach” the leather, and wrap it every night with a ball in the pocket you want. Avoid heavy oils, ovens, and shortcuts that kill the leather. Use glove-specific products like Rawlings Glovolium, Wilson Pro Stock Glove Conditioner, or Nokona NLT Classic, and simple tools like a Rawlings or Franklin mallet and a basic glove wrap—all readily found on Amazon. In two to three weeks, you will have a mitt that fits your hand, your style, and your position—and it will stay that way for a long time. That is the 2026 way: smart, light, and repeatable care that makes the leather better every day you use it.