
We are reader supported. When you purchase through links on our site, we may earn an affiliate commission. Also, as an Amazon affiliate, we earn from qualifying purchases.
Relacing a baseball glove brings old leather back to life and restores feel, control, and confidence. With a clear plan and a little patience, you can do it at home. This guide walks you through tools, prep, lacing patterns, tension, adjustments, and break‑in. Follow the steps, keep your pace steady, and check your work often. By the end, your glove will open and close cleanly, the pocket will hold shape, and the web will feel tight and safe for game use.
Why Relacing Matters
Laces carry the structure of the glove. They hold the web, set pocket depth, and control the hinge. Worn or broken laces make the glove floppy, slow, and unsafe. Relacing fixes those issues without changing the leather you already trust. It also lets you tune pocket depth, finger stiffness, and wrist fit to match your hand and position.
What You Will Learn
You will learn how to map your glove, remove old laces in the right order, thread and tension new rawhide, and tie clean finishes. You will also learn how to set pocket depth at the heel, how to balance tension across the fingers and web, and how to break in the glove after a fresh relace so it feels natural again.
Tools and Materials
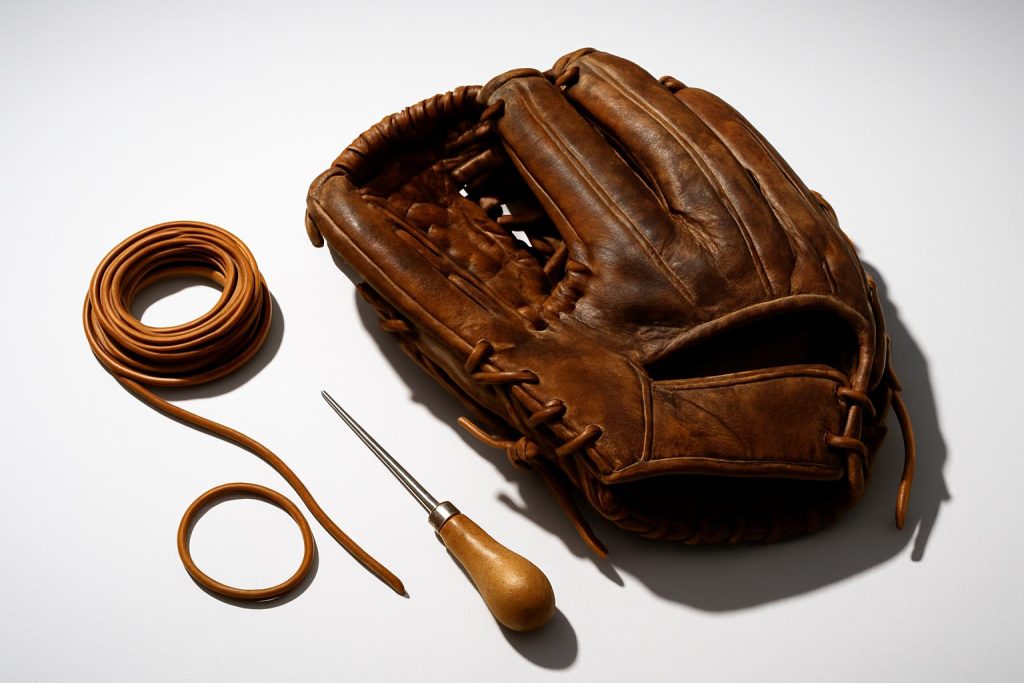
Rawhide laces. Use standard 3/16 in for most adult gloves. Use 1/8 in for small youth gloves or very tight channels. Choose high quality rawhide for strength and smooth draw.
Lacing needle. A screw‑on or slotted lacing needle helps you feed lace through tight or blind holes. It saves time and keeps tips from fraying.
Pliers. A small pair of flat or needle‑nose pliers helps pull lace ends through snug holes and holds knots during tie‑off.
Awl or small punch. Useful for reopening clogged holes. Do not widen holes more than needed.
Scissors or a sharp knife. For trimming lace ends cleanly.
Leather conditioner and a clean cloth. A light refresh prevents friction burns and cracking during lacing.
Tape measure and notepad. For measuring old lace segments and recording lengths.
Painter tape and a marker. For labeling start points and sections as you remove lace.
Know Your Glove: Anatomy and Lace Map
Fingers. Index to pinky stalls connected by cross laces and top runners. These control stiffness and ball funneling.
Thumb and pinky edges. Long edge laces form the outer frame and carry heavy load during catches.
Web. The lace set that joins thumb and index to the web piece. This must be secure and balanced so the ball does not slip.
Heel. Bottom cross laces that close the palm to the back shell. These rows set pocket depth and hinge feel.
Palm and wrist. Laces at the palm seam and wrist strap control closure and hand fit.
Each hole matters. Many holes are paired across a seam. Lace passes typically alternate over and under leather layers. Keep this pattern clean to avoid twists and pressure points.
Plan First: Prep That Saves Time
Clean the glove lightly. Wipe dust and dirt with a dry cloth, then apply a small amount of conditioner. Let it absorb for 10 to 15 minutes. This reduces friction while you pull new lace.
Take photos from all angles. Capture the web, heel, finger tops, and inside the palm. Take close‑ups of knots and crossovers. These images are your map when pattern memory slips.
Label your start points. Use small strips of painter tape to mark where each lace segment begins and ends. Write web, fingers, heel, and wrist on the tape for quick reference.
Measure old segments. As you remove each segment, measure and note the length. Cut new lace with a bit of extra length for tie‑offs. Matching old segment lengths keeps your workflow smooth.
Work section by section. Do not strip the entire glove at once. Remove and relace one segment before moving to the next. This keeps the glove stable and your pattern accurate.
Remove Old Laces Safely
Cut only the knots. Leave the body of each lace intact so you can read the path. Avoid cutting across seams or scraping edges with the blade.
Pull gently. Use pliers to guide the old lace out. If a hole is sticky, rotate the lace end rather than yanking. If needed, reopen the hole with an awl from the original direction.
Keep orientation. Note which side of the leather the lace traveled on each pass. Over and under patterns affect how the glove flexes.
Threading Basics and Technique
Load the needle. Cut the lace tip at a shallow angle for a clean lead. If you use a slotted needle, wedge the lace tight so it does not slip while pulling.
Smooth the path. If a hole feels tight, lift gently with an awl. Do not twist the needle hard in the hole. Twists create burrs and weaken the leather.
Control tension. Pull snug, not harsh. The lace should seat flat without wrinkling nearby leather. Tension should match hole to hole so the seam looks even.
Keep the lace flat. Watch that the rawhide does not spiral. A flat lace spreads load and lasts longer.
Hide knots inside. Wherever possible, place knots on the inside or under a flap so they do not grab dirt or rub your hand.
Recommended Lacing Order
Following a stable order keeps structure aligned while you work. Start at the web, then the fingers, then thumb and pinky edges, then heel, then palm and wrist. This flows from the top of the glove to the base and avoids fighting tension in later steps.
Step 1: Relace the Web
Match the old pattern. Web styles vary, but the idea is the same. You will anchor at the thumb or index side, run through the web piece and anchor holes, and return across to lock the web in place. Follow your photos and keep symmetry left to right.
Seat the web center. The top of the web should sit straight with no tilt. If it leans, your throws will feel off and balls can roll. Adjust by loosening and rebalancing tension on the last few passes until the web sits square.
Anchor tightly. Once the web looks centered and even, tie a compact knot on the inside where it will not snag. Trim the tail and press it flat.
Step 2: Relace the Fingers
Start at the top runners. Many gloves have a top lace that runs across finger tips. Thread from the index side, cross each finger top, and finish at the pinky. Keep spacing equal and tension even. The top runner prevents finger stalls from spreading.
Crisscross the finger stalls. Move to the cross laces that connect the back of the fingers. Work from index toward pinky. Feed through each matched pair of holes in an over and under rhythm so the lace lies flat. Check that each finger opens and closes freely after a few passes. If a finger binds, you are too tight.
Leave play at the hinge. The lower finger crosses near the palm influence the hinge. Keep them snug but leave a bit of flex. If these are over‑tight, closing the glove will feel stiff.
Step 3: Relace Thumb and Pinky Edges
Edge laces create the outer frame and carry major load. Start at the wrist end of the thumb edge. Thread up the thumb channel, keeping the lace flat against the edge binding. Maintain steady tension at each hole. Do not skip holes. Finish at the web anchor and tie inside.
Repeat on the pinky edge. Consistency matters. Match the thumb side tension so the glove does not warp. After both edges are in, check that the glove lies flat on a table with no twist. If it rocks or twists, loosen the tighter side by one or two holes and rebalance.
Step 4: Relace the Heel
The heel is the control center for pocket depth and hinge feel. The cross rows here join the palm to the back shell. Each row you install or remove changes pocket depth slightly.
Follow the original row count. Start at one side, weave across the matched holes in a simple over and under pattern, and return. Keep rows parallel. Seat each cross snugly so the bottom seam looks straight.
Set pocket depth. If you want a deeper pocket, you can reduce one cross row compared to the original. If you want a shallower pocket with a quicker release, add a row. Make small changes and test closure by hand before tying off the last row.
Balance left to right. The heel must sit flat. If one side looks higher, loosen that side a touch and retension the opposite side until the seam settles.
Step 5: Relace Palm and Wrist
Relace the palm seam. This lace locks the front and back together around the hinge. Keep it snug, not stiff. You should feel a smooth opening and closing without a sharp click.
Relace the wrist strap. Thread the wrist lace through the strap slots and the back shell holes. Adjust to fit your hand. Secure the tail on the inside so it does not rub your wrist. Try the glove on and close it a few times. Adjust one hole looser or tighter until it feels secure but mobile.
Set Tension Like a Pro
Check symmetry often. After every three to five holes, look across the glove and compare left and right. If one section looks tighter, loosen before you move on.
Use step tension. Pull firm on the first pass through a hole, then seat with a second gentle pull to flatten the lace. This prevents shock loads that tear holes.
Test closure as you go. After each section, close the glove with a ball in the pocket. The glove should close along the hinge you prefer. If closure drifts toward the web or heel, rebalance tension in that region.
Finishing Knots That Hold
Keep knots low profile. A compact square finish or a double overhand works well. Wet the knot lightly with a touch of conditioner to help it seat. Pull both ends evenly, then trim tails to a modest length.
Hide ends. Tuck trimmed tails under a flap or between layers so they do not snag grass or dirt. Press them flat with pliers.
Tune Pocket Shape and Depth
Shape with the heel. Pocket depth depends on heel rows and finger cross tension. More heel crosses and tighter lower finger crosses give a shallower pocket and faster transfer. Fewer heel crosses and slightly softer lower finger crosses give a deeper pocket and more hold.
Center the pocket. Catchers and outfielders often set a deeper pocket centered under the web. Infielders often prefer a quicker, shallower pocket near the index. You can shift the pocket slightly by easing tension on the target side and tightening the opposite side a touch.
Lock the web. The web lace must be tight enough to keep the ball secure. After shaping the pocket, return to the web and give a final gentle seat pull to each pass.
Break In After Relacing
Warm up the leather. Apply a thin layer of conditioner to the laces and high friction seams. Do not soak the glove. Wipe off any excess.
Form with a ball. Place a ball in the pocket where you want the glove to close. Close the glove around it and wrap with a soft band for a few hours. This sets the initial shape.
Play catch. Nothing replaces catch work. Throw for 20 to 30 minutes, focusing on clean closures and transfers. Adjust the wrist strap if it feels loose as the lace seats.
Check tension again. New lace will relax slightly in the first session. Retension the web and any loose crosses with a gentle pull at the ends or by retying a knot if needed.
Troubleshooting
Glove feels too stiff. Loosen the lower finger crosses by one hole each and ease the heel crosses a touch. Work the glove with a ball for 10 minutes and reassess.
Glove feels floppy. The top finger runner or web is too loose. Retension those runs first. Then add a touch of tension to the thumb and pinky edges.
Web sits crooked. Loosen the last three to five passes and rebalance left to right until the web sits centered. Retie and trim again.
Holes look stretched. Stop and reduce pull force. Use an awl to open holes gently instead of forcing the lace. Condition lightly and let the leather rest 10 minutes before continuing.
Knot slips. Rethread and seat the knot with even pull on both sides. Slightly roughen the inside of the knot with the back of the knife to increase grip, or finish with a second wrap if space allows.
Common Mistakes to Avoid
Stripping the entire glove at once. This erases your map and increases error risk. Work one segment at a time.
Overtightening early passes. Early heavy tension creates wrinkles and misalignment. Set light tension first, then seat passes evenly at the end.
Twisted lace. A twisted lace cuts into leather and fails early. Keep the rawhide flat and smooth around edges.
Skipping conditioner. Dry leather grinds against new lace and tears holes. Always prep with a light conditioner pass.
Loose web ties. A loose web is a safety issue. Double check web tension before playing.
Simple Maintenance Schedule
After first session. Retension any slack passes, especially at the web and top runners. Confirm knots are seated.
After two weeks. Wipe dirt, add a thin conditioner layer to high wear areas, and check heel rows for evenness. Rebalance if the pocket drifted.
Every month in season. Inspect thumb and pinky edges, confirm web is tight, and look for frayed tails. Replace any damaged segment early rather than waiting for failure.
Time, Pace, and Confidence
Expect 60 to 120 minutes for a first full relace. Take breaks if your hands tire. Check photos often. The more you respect each pass, the better the glove will feel on day one and the longer the laces will last.
Conclusion
Relacing a baseball glove is a practical skill that extends the life of your leather and fine tunes how it plays. With the right tools, a clean plan, and steady tension, you can rebuild the web, set the pocket you want, and secure a reliable hinge. Take your time, photograph your steps, keep the lace flat, and finish with thoughtful break‑in. Keep up with small checks in the first two weeks, and your glove will reward you with dependable feel all season.
FAQ
Q: What lace size should I use for relacing a baseball glove
A: Use standard 3/16 in rawhide for most adult gloves and 1/8 in for small youth gloves or very tight channels.
Q: In what order should I relace the glove
A: Start with the web, then the fingers, then the thumb and pinky edges, then the heel, and finish with the palm and wrist.
Q: How tight should the laces be
A: Pull snug so the lace seats flat without wrinkling leather, and keep tension even hole to hole so the glove opens and closes smoothly.
Q: How can I make the pocket deeper or shallower
A: Adjust heel rows and lower finger crosses; fewer heel crosses and slightly softer lower finger crosses deepen the pocket, while more heel crosses and tighter lower finger crosses make it shallower and quicker.
Q: How long will a first full relace take
A: Expect 60 to 120 minutes, and plan short breaks to keep tension consistent and your hands fresh.