
We are reader supported. When you purchase through links on our site, we may earn an affiliate commission. Also, as an Amazon affiliate, we earn from qualifying purchases.
A backyard batting cage is only as good as its drainage and maintenance. If water sits, turf buckles, posts rust, and swings stop. If the base drains and the routine is simple, you train more days with less hassle. This guide walks you through clear steps to build drainage that works, keep it working, and fix problems fast. New to DIY or baseball gear care is fine. Follow the sections in order or jump to the parts you need now.
Why Drainage Matters For Every Backyard Cage
Drainage protects the surface, the structure, and the athletes. Standing water soaks turf, weakens the base, and creates slip hazards. Wet nets grow mildew and add weight to frames. Poorly drained post holes trap water and speed up rust. Good drainage avoids all of this and cuts maintenance time.
Common Drainage Failures To Watch For
Low spots that hold puddles after rain. Turf seams that open or ripple. Muddy entry areas that stay slick. Net bottoms that wick moisture from wet ground. Posts with rusty bases or soft soil around the footing. If you see any of these, you need grading, base work, or drains, not just a mop.
Plan The Site Before You Build
Pick The Right Location
Choose a high, flat area that already sheds water. Avoid depressions and places where roof downspouts empty. Keep a setback from fences and trees to reduce roots, leaves, and shade that slow drying. Give yourself space around the cage for maintenance access and drain outlets.
Orient For Sun And Wind
Set the long axis so morning sun reaches the surface. Early light dries dew and rain. If local wind often hits one direction, face the entry away from it to reduce wind driven rain and leaf buildup at the gate.
Know What Is Underground
Locate utilities before digging. Mark irrigation, gas, power, and septic lines. Plan drains and post holes to avoid them. A small change in layout now can prevent a safety incident later.
Build A Base That Sheds Water
Start With Solid Subgrade
Strip organic topsoil and soft spots until you reach firm ground. Lightly moisten and compact the subgrade. Aim for a smooth plane with a gentle slope of 1 to 2 percent away from the cage. That is about 1 to 2 inches of fall every 8 feet.
Install Geotextile Fabric
Lay nonwoven geotextile fabric over the subgrade to separate soil from stone. Overlap seams by 12 inches. Fabric improves stability and keeps fines from clogging the base and drains.
Add A Draining Stone Base
Place 3 to 4 inches of compactable crushed stone. A 3 quarter inch minus or 3 eighth minus mix works well. Spread evenly and compact in thin lifts until firm. Add 1 inch of stone dust or decomposed granite as a leveling course if installing turf. The finished base should keep the same 1 to 2 percent slope you set in the subgrade.
Choose Surface: Artificial Turf Or Natural Grass
Artificial turf over a compacted stone base drains fast and stays even. It also limits mud and rutting. Natural grass under a cage is easy at first but becomes patchy and muddy with traffic. If you must keep grass, use ground protection mats in high wear zones, aerate often, and expect more downtime after rain.
Edge Restraints Keep Everything In Place
Install bender board, pavers, or treated lumber as edge restraint around the base. This stops turf creep and keeps stone from migrating. Set edges to match your finished grade and slope so water flows across and off without catching at the border.
Perimeter French Drain For Heavy Soils
Clay soils or flat yards benefit from a perimeter French drain. Dig a trench 18 to 24 inches deep and 6 to 8 inches wide along the low side or around the entire cage if needed. Line with geotextile, place a 4 inch perforated pipe with a sock, then backfill with clean 3 quarter inch stone up to a few inches below grade. Wrap the fabric over the top of the stone and cover with gravel, turf, or soil as needed. Give the pipe a steady 1 to 2 percent slope to an outlet that discharges to daylight or a dry well. Never connect to a sanitary line.
Trench Drain At The Entry
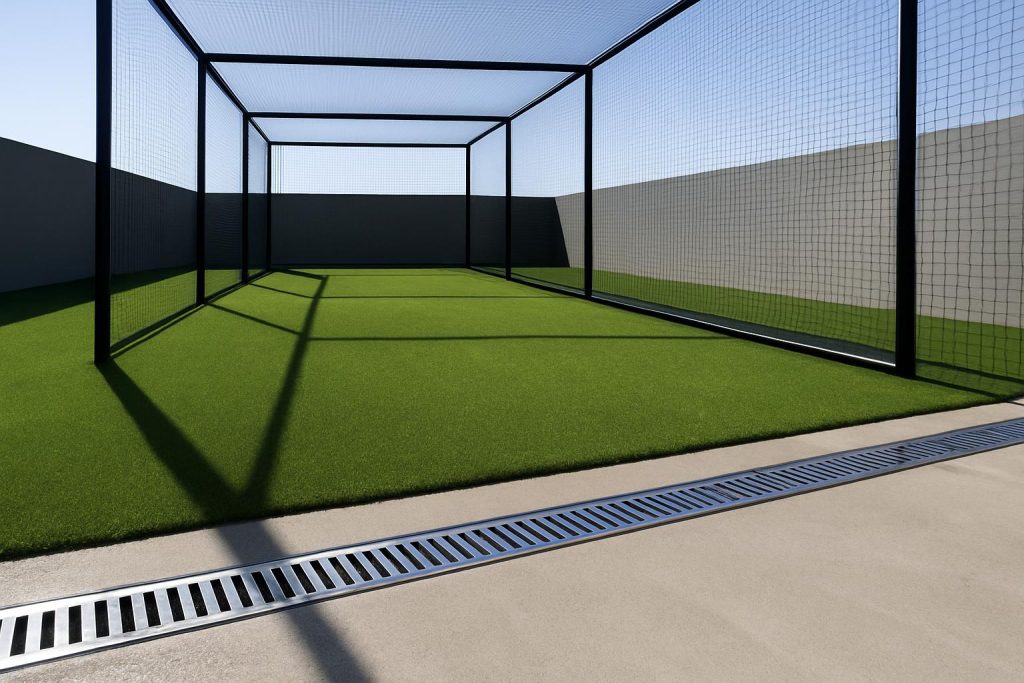
The gate is a wear point that often pools water. Add a small trench drain or channel drain across the doorway. Bed it in concrete or compacted stone, keep it level, and slope the outlet line to your drain or daylight. This keeps shoes drier and extends the life of the entry mat.
Plan Safe Outlets
Every drain needs a clear discharge point. Outlet pipes should terminate at a slope where water can spread and soak in away from structures and neighbors. Protect the outlet with a grate and stone splash pad. Keep outlets above the high water level of any swale or ditch to prevent backflow.
Simple Bill Of Materials And Dimensions
Nonwoven geotextile fabric around 6 ounces per square yard. Crushed stone base 3 to 4 inches thick. Leveling layer 1 inch of stone dust. Edge restraint boards or pavers as needed. Artificial turf with perforations for drainage plus optional 5 millimeter shock pad in batting zones. French drain trench 18 to 24 inches deep, 6 to 8 inches wide, 4 inch perforated pipe, clean 3 quarter inch stone. Trench drain at entry with 4 inch channel and grate. Slope all surfaces and pipes 1 to 2 percent.
Keep Water Moving With Routine Care
Daily And After Rain Checks
Walk the surface and look for puddles, soft spots, or seam lift. Step on turf in several places. If water wells up, delay heavy use. Shake the bottom of the net to release drops and keep it from wicking ground moisture. Clear leaves from drains and outlets.
Weekly Tasks
Brush turf fibers with a stiff broom or power broom to keep them upright and open. Redistribute infill if you use it. Rinse the net with a garden hose if dust or pollen builds up and let it air dry fully. Inspect the entry drain and perimeter drain grates and clear debris.
Monthly And Seasonal Tasks
Check slope and grade visually and with a straightedge. Top up low spots with stone dust under turf or with additional gravel along edges. Tighten frame hardware and check anchors. Look for rust at the base of posts and touch up chips with a zinc rich coating. At season end, wash the net with mild detergent and water, rinse, and dry fully before storage or re hanging.
Storm Prep Steps
Before heavy rain or wind, lower the net or bundle it and tie it off so it does not act like a sail. Remove L screens, tees, and loose gear. Check that drain outlets are clear. After the storm, clear debris first, then assess for pooling. Do not beat a wet net to knock off water. Shake and air dry instead.
Winterization And Snow Management
In snow zones, take the net down or lower and bag it when snow is forecast. Brush off light snow from turf with a soft broom and let sun and air do the rest. Avoid using salt on turf. If the ground freezes, avoid aggressive rolling or edging work. Resume heavy use when the surface is firm and thawed.
Care For Net, Frame, And Hardware
Dry Nets Fast And Fully
Wet nets stretch, get heavy, and grow mildew. After rain, lift the bottom skirt off the ground and shake to remove drops. Spread the mesh so air can move through. If shade keeps the net damp, move the lower panels to sun for a few hours. Never store a wet net in a bag.
Clean Nets The Right Way
Use mild soap and water only. Spray with a hose to rinse. Avoid harsh chemicals that can damage fibers. Let the net air dry completely before putting full load on it again. A clean, dry net resists mildew and smells better.
Stop Rust Before It Starts
Keep metal off soil. Use base plates on pavers or set posts in ground sleeves with a gravel weep at the bottom to drain water away. Inspect welds and hardware for chips. Touch up exposed metal with a zinc rich coating. Use stainless or galvanized carabiners and snap links. Lubricate moving parts with a dry lubricant that does not attract grit.
Anchor Systems That Survive Weather
Auger style ground anchors or concrete footings with sleeves hold best. If you use sandbags or stakes, check them after storms. Keep anchor points clear of pooled water to reduce corrosion and soil softening.
Turf And Surface Care That Extends Life
Groom Fibers And Manage Infill
Brush fibers weekly so they stand upright and drain. If you use sand or rubber infill, keep depth even across the surface. Low infill leads to matting and poor drainage. High infill holds water and adds weight. Top up only as needed.
Keep Odors Down And Hygiene Up
Rinse sweat and spills off the turf with water. Use mild soap for stubborn spots. Good drainage and sun exposure prevent odors. Let surfaces dry fully before covering with mats.
Repair Seams And Edges Early
Lifted seams catch water and debris. Reseat with outdoor turf adhesive on a clean, dry base. Weigh down until cured. Secure edges to the restraint boards to stop creeping. Small fixes now prevent large tripping and drainage issues later.
Troubleshooting Water Problems
Standing Water On The Surface
Check slope first. If the grade is flat or reversed, regrade the base. Next, probe the base for fines buildup. If the top inch is muddy, lift the turf, remove contaminated material, and replace with clean stone dust. If the area is large, add a French drain on the low side to intercept groundwater.
Mud At The Entry
Install or clean a trench drain at the gate. Widen the hard surface apron with compacted stone and turf or pavers. Add a brush mat outside the gate to knock off mud before entry. Redirect any nearby downspout away from the path.
Spongy Turf After Light Rain
Spongy feel means trapped water or compaction. Brush the fibers to open them. If water still lingers, perforate the base lightly with a manual aerator and top dress with stone dust to restore porosity. Confirm that the perimeter drain and outlets are clear.
Drain Outlet Smell Or Backup
Organic debris can rot in the line. Flush with a garden hose from the upstream cleanout. Remove and clean the grate. Add a screen at the upstream catch points to keep leaves out. Check that the outlet is above any standing water level so the line can breathe.
How To Resume Use After Rain
Simple Field Test
Step firmly on several spots. If the surface supports your weight without squishing or water rising, you can begin light use. For heavy batting practice, wait until the base is firm and dry. In warm weather on a well drained base this is often 24 hours. In cool or humid weather it may take longer.
Protect Wear Zones
Place hitting mats where batters and pitchers plant their feet. Rotate mats weekly to spread wear. Mats reduce rutting that can open seams and hold water.
Budget Paths To Good Drainage
Good
Basic slope on native soil, geotextile fabric, 3 inches of crushed stone, edge restraints, turf on top. Add a simple apron at the entry. Works for lighter use and faster drying climates.
Better
Thicker base at 4 inches of crushed stone, 1 inch leveling layer, perforated turf, trench drain at the gate, and a short French drain along the low side. Reliable for most backyards and moderate rain.
Best
Full perimeter French drain, 4 inch perforated pipe with clean stone, 4 inches of base, 1 inch leveling layer, premium perforated turf with shock pad in batting zones, rigid edge restraints, and hardscape apron entries. With this setup you train quickly after storms and protect the cage long term.
Common Mistakes To Avoid
Flat Builds
No slope means no drainage. Always set 1 to 2 percent grade away from the cage interior.
Skipping Fabric
Without geotextile, soil fines pump into the stone and clog voids. Fabric is cheap insurance.
Wrong Stone
Round river rock does not compact or drain in a stable way for sport surfaces. Use angular crushed stone.
Buried Outlets
Plants, mulch, and soil creep block outlets. Keep them visible and protected with a grate.
Leaving Nets On Wet Ground
Nets that touch damp soil stay wet, stretch, and mildew. Keep the bottom hem off the surface and let air move through.
Safety And Compliance Basics
Slip And Trip Prevention
Keep surfaces even and clean. Fix lifted seams quickly. Brush turf to reduce slickness. Add a non slip mat at the gate and keep it clear.
Electrical And Lighting
Use outdoor rated, ground fault protected circuits. Keep cords off the ground and out of drains. Secure lights and cables to the frame without piercing protective jackets.
Water Discharge Respect
Send water to your property only. Do not drain toward a neighbor or a sanitary system. Use daylight outlets or dry wells sized to your soil and space.
Simple Maintenance Schedule
Daily
Quick walk around. Clear debris. Shake net bottom. Check entry for mud.
Weekly
Brush turf. Rinse net if dusty. Inspect drains and outlets. Rotate hitting mats.
Monthly
Check grade and edges. Top up low spots. Tighten hardware. Touch up rust protection.
Seasonal
Deep clean net and turf. Inspect anchors and posts. Service drains. Winterize or storm prep as local weather demands.
Conclusion
Drainage is not an add on for a backyard batting cage. It is the core of a safe, durable, and ready to use training space. Set slope, separate soil with fabric, build a compacted stone base, and add drains where soil or weather demand it. Keep outlets clear, keep the net dry, and fix small issues fast. With a steady routine, you will train more days, spend less time on repairs, and extend the life of every part of your cage.
FAQ
What is the best base under a backyard batting cage for drainage
A compacted base of 3 to 4 inches of crushed stone over nonwoven geotextile with a 1 inch stone dust leveling layer under perforated artificial turf gives fast drainage and a stable surface. Keep a 1 to 2 percent slope away from the cage interior and lock edges with restraints.
How deep should a French drain be around a batting cage
Dig 18 to 24 inches deep and 6 to 8 inches wide, line with geotextile, lay a 4 inch perforated pipe with a sock, and backfill with clean 3 quarter inch stone. Wrap the fabric over the top and slope the pipe 1 to 2 percent to a safe outlet.
How do I fix water pooling inside my batting cage
Check and restore slope, clear drain outlets, brush and open turf fibers, and lift the turf to replace contaminated base with clean stone dust if fines have clogged it. Add a trench drain at the entry or a French drain on the low side if pooling persists.
How often should I clean and dry the batting cage net
After rain, shake and air dry the net fully before heavy use. Rinse weekly if dusty, wash monthly with mild soap and water, and do a deep clean at season end before storage or re hanging.
Should I take the net down for winter
In heavy snow or wind regions, take the net down or lower and bag it before storms. Elsewhere, lower and bundle it for major storms, remove loose gear, and let the frame handle the weather with regular checks.